Creating Effective Presentations with stock Apple applications
When you don’t have access to advanced editing software (i.e. on work devices), sometimes you’re going to need to abuse the stock applications installed on your Mac.
I like to use:
- iMovie
- Quicktime Player
- Keynote
For creating images for animations, I like to use SimpleDiagrams4, which is free for a 7 day trial and then 50 bucks. Super worth it IMO.
Creating Diagrams
As mentioned, I use SimpleDiagrams4. I make sure I download all of the free libraries on their site so I have a large range of shapes and icons to work with.
I make the Document size 4000x4000px. This lets me zoom around the diagram later without ugly aliasing effects when I zoom in.
SimpleDiagrams4 does not support animation, but you can create different frames and export them. We’ll animate them in Keynote later.
When you’re happy, export your diagrams as a PNG file, and uncheck the Export background option - we want a transparent background.
Animating Diagrams
This part takes a lot of finesse. Import your SimpleDiagrams PNG file into a blank slide in Keynote.
There are two ways to animate slides.
-
Method 1 contains all of the animation logic in one slide, and it’s great for small animations, but can get REALLY confusing when you move around more than 5-6 times.
-
Method 2 will create a bunch of slides, and is not as customizable as Method 1 - but I recommend using this method until you know for sure you need Method 1.
Method 1 involves using Keynote’s built-in animation system. This will involve a mixture of Build In, Action, and Build Out animations. These are governed by the Build Order. You can use the Build Order to make really fine-grained animations with specific delays and start/stop points.

Method 2 involves abusing Keynote’s built-in Magic Move between-slide transition. This amazing transition detects similar objects (or words or characters) and tweens them across distinctly different slides. This workflow involves creating one slide for each tween of animation. It’s not very configurable, but it works really well for scooting around a large image with smooth movement.

I prefer to use Method 2 unless I have to animate multiple things at once.
This part is more art than science, so be prepared to work hard on it.
Exporting your animated diagram
- In Keynote, Play -> Record Slideshow
- Record yourself animating the slides
File->Export To->Movie
Recording your screen
- Open Quicktime Player
File->New Screen RecordingStart Recording->Stop Recording->Save
Feel free to narrate your actions or don’t - we can always add voiceovers later.
You will now have a .mov file with your screen recording.
Editing your screen recording
- Open iMovie
- Import your
.movfile and put it on the timeline - When finished, export your file (see Editing and Exporting Your Presentation below)
Editing and Exporting Your Presentation
- Open iMovie
- Go nuts
- You can re-record voiceovers by hitting
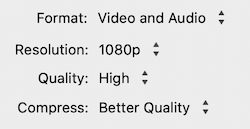
V - When you’re satisfied,
File->Share->File - Use the following settings
Turning a recording into a GIF
Note: make sure you convert .mov files to .mp4 via iMovie before doing this.
- Open Keynote
- Create a slide that’s just your video file
File->Export to->Animated Gif

Compressing your GIF
Once you have your .gif - use gifsicle to compress it.
https://formulae.brew.sh/formula/gifsicle
# Compress input.gif
gifsicle -i input.gif -O3 --colors 256 -o output.gif
Creating demo GIFs
For creating simple GIFs, I like to use Licecap.
Make sure you save your file name as [file-name].gif (if you don’t include the .gif suffix, it’ll fail on Macs.)